|


|
|


Setting Up A ESD Workstation
My ESD Safe SMD Soldering Station
and what I used to build it. (on a budget)
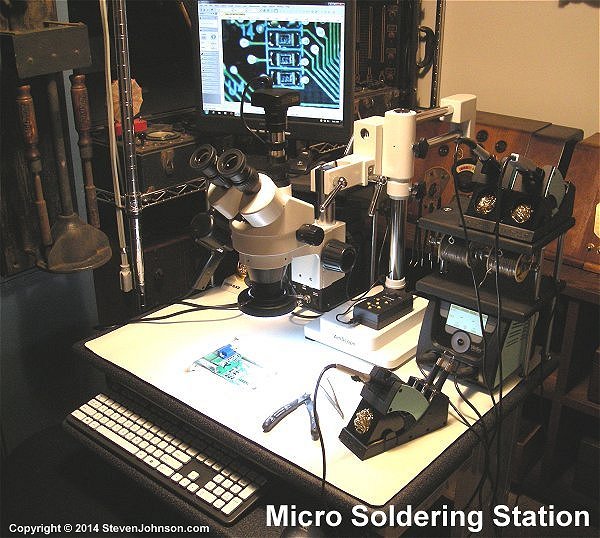 |
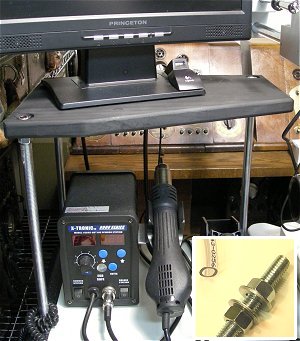
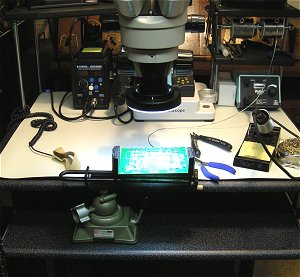
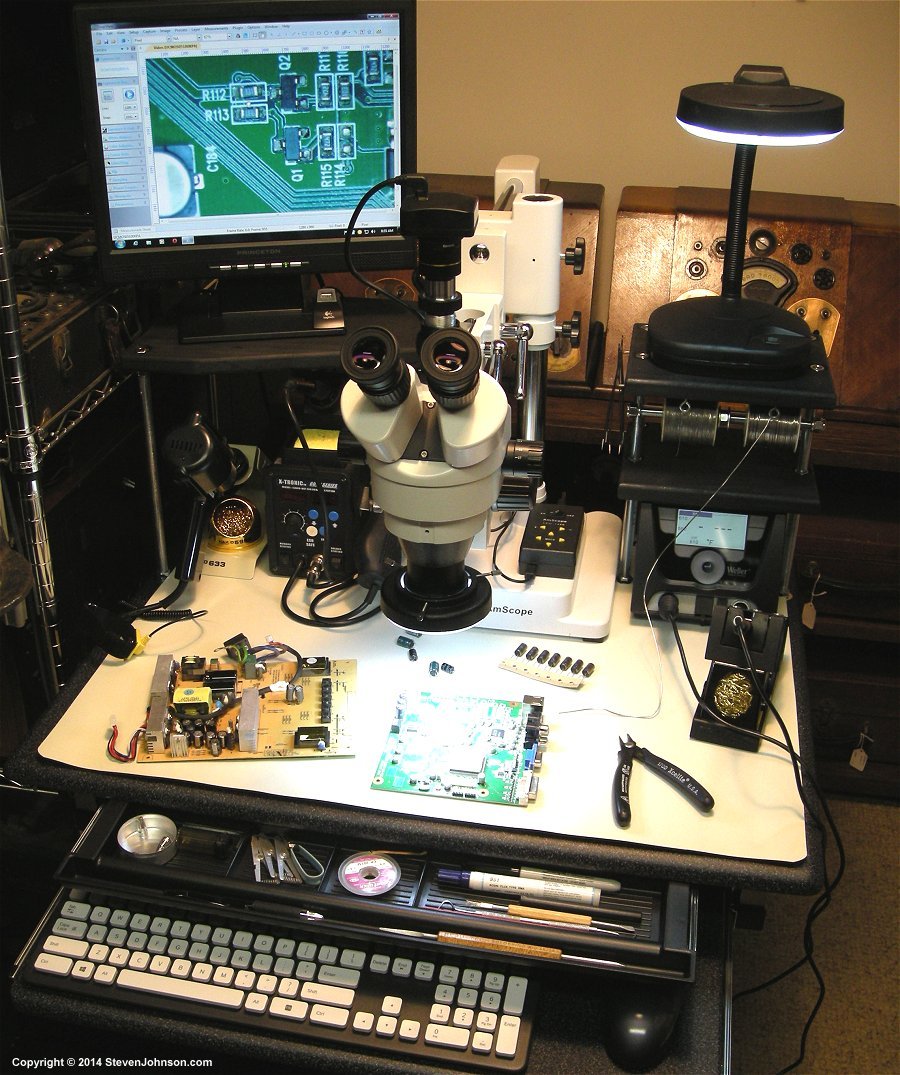
My Completed Soldering Workstation
When working on the newer, smaller, surface mount components, ICs and circuit boards static can be a serious a problem. Not only are the new
surface mount devices (SMD) small and harder to work with, many can be ruined by a small electrostatic discharge (ESD). Making sure all your
equipment, the work surface, and your body are at the same potential is critical.
This bench I put together includes an inspection microscope that is designed for enough room to work on micro-electronics under the lens.
|
Choosing A Microscope

|
First, deciding on which inspection microscope you are going to use is critical. Physical size and space requirements will be needed before selecting a
bench to use it on. The type of microscope you select should take into account what you will use it for and how long. For micro soldering surface mount components a
stereo zoom microscope with enough workspace below the lens is reccommended. Stereo eyepieces gives the user 3D depth perception critical to soldering small components.
The amount you have budgeted is also important. There are two basic types of inspection microscopes.
The "Mantis" starts at a little over $1,000 and is better suited for a production environment where the scope has to be used for long hours.
It has a larger viewing area so you are not looking through eyepieces.
The entry level model does not zoom and you have to change lenses for different magnifications.
Still if you have the budget and you are only using the scope for surface mount work consider it.
The second type is a stereo zoom microscope. These will zoom through the magnification range you will need without changing lenses.
If you are only using a scope for shorter periods and on a tight budget these are worth looking at. Just be careful as every stereo
microscope does not have the required working distance beneath the head.
Amscope is a popular line of stereo zoom microscopes and they are half or less the cost of a Mantis.
A basic stereo zoom microscope with a boom stand from Amscope should be under $400.
Remember You will need to add an illuminator though. Better ones start at around $80.
Due to my budget I purchased an Amscope SM-4TZ-144A boom 3.5X-90X stereo zoom microscope. The microscope covers the 3.5X-90X range using a combination of two barlow lenses. The lower .5X lens is all you will probably need for soldering surface mount components.
I have found 6X-10X range the best for my soldering use as it gives me over six inches of working distance. The optics are fine
for my use and amazingly good for the price. I purchased mine with the additional barlow lens to go up to 90X as I will also use it for studying other objects such as bugs with the grand kids.
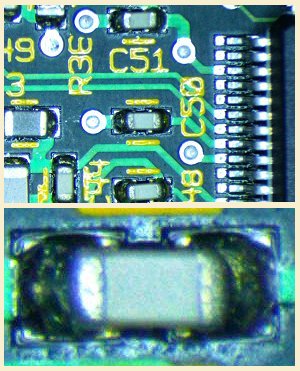
I also purchased a 5 mega pixel USB microscope camera (Model MU500) and a 144 LED illuminator.
Light is very important when taking photos. When you divide the light between two eyepieces and a camera port, the amount of light
is critical. The photos at left were taken using only the 144 LED ring illuminator.
|

Location, Location, Location
|
Where to put it?
Inspection microscopes take up a lot of bench space. Add to it room for a soldering station, hot air tool,
a de-soldering gun or station, hand tools, and solder, even a large workbench's workspace is reduced by up to 50%. The set-up I envisioned would have
taken up almost half of my electronics workbench. I decided that since micro soldering does not need a heavy duty workbench I would look for a roll around desk or smaller bench to set up a
dedicated ESD/micro soldering work station.
The Amscope microscope I chose is about 30 inches deep including the microscope head and boom stand. I felt I needed to work with the scope before choosing a table to see how
much room was actually needed to have enough workspace under the microscope head for working on circuit boards.
After trying it out I decided the absolute minimum depth of a table would need to be 22 inches in order to have enough workspace under the lens.
Figuring I also needed enough room for a couple of soldering and rework stations I would need a table 30 to 36 inches wide.
Shelves would be a plus since I also needed a stand for a computer monitor. The boom stand would stick out the back so any shelf would have to be higher
than the boom or be off to one side.
Knowing my minimum requirements for size and options, and wanting to not spend over $150 on a work table or computer desk,
I began my search. A search for workbenches quickly told me they were out of my price range. Doing a quick search for "Computer Desk" on ebay and amazon gave me a list of thousands of computer desks to choose from.
Unfortunately, I soon found out most computer desks did not meet my minimum 22 inch depth requirement.
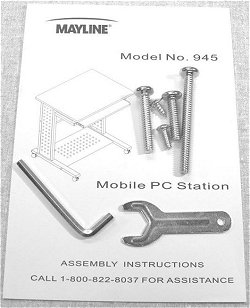
After narrowing the search to about five choices I selected a Mayline 945 series computer desk (Model 945ANT).
The work surface of the Mayline had a 23 inch depth and a width of 29¾ inches. It also had a metal stand and looked very sturdy for my use.
I was able to find several suppliers selling it for under $100 along with free shipping keeping me well within my budget.
The Mayline computer desk arrived two days after placing the order. It was studier than I had hoped and went together with ease.
I was impressed that Mayline had included a spare of each type of screw needed for assembly.
|
Shelf Construction
|
Since I opted for a computer desk with no shelves, I had to figure out a way to construct shelves to raise the
computer monitor to eye level and hold tools and rolls of solder. The microscope boom sticks out the back so I had to either
build a shelf high enough to clear the stand or build shelves on either side. I chose the latter as I thought a shelf
above the microscope would be too high for a small flat panel computer monitor.
I felt the monitor should be more at eye level when using the microscope camera.
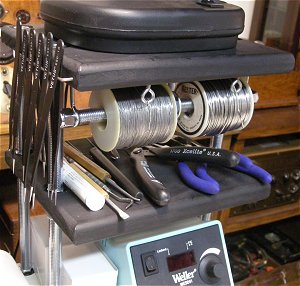
During a trip to the local hardware store to find something to use as shelves I walked past a rack of threaded rods.
Using 12 inch lengths of 3/8 inch rod I was able to construct adjustable wood shelves.
I drilled holes and mounted the rods through the work surface securing them top and bottom with washers and nuts.
Changing height or adding shelves later can easily be accomplished by adding longer rods or adjusting the spacing of the nuts.
After I was happy with the height of the shelves, I slid cut sections of 3/8 inch clear PVC tubing over
the rods between the shelves to cover the threads and give the posts a high tech look.
Hanging a short section of threaded rod covered with PVC on a couple of small hooks under one of the shelves made an excellent solder roll holder. Lock nuts on each end hold the rod in place and small eyelets to run the solder
through help to keep it from becoming tangled and falling all over the place. I left enough room to store cutters and hand tools underneath.
I have several different size tweezers and it can be a pain to sort through them to find the one you want.
I had some sections of stiff nickel plated copper wire salvaged from a 1920s radio chassis. I bent the ends at a right angle, drilled smaller holes in the side of the shelf holding the solder and pressed the wire in about a half an inch.
I now have a place to hang tweezers and can pick one without rummaging through a pile.
|
Anti-Static

|
Static is a huge concern. Making sure your work surface, your body, and your tools are at the
same potential as what you are working on. This is
important when handling or soldering newer static sensitive components. This may be accomplished by grounding the bench and
using an anti-static mat, wearing an anti-static wrist strap, and using ESD safe soldering irons and hand tools.
For a home hobby bench there are short cuts. For a production environment everything mentioned is usually required.
An anti-static mat usually has a rubber backing. The surface is made from a material with very high resistance. The mat is
typically grounded through a cord with a clip and banana plug which can be attached to a ground point.
The resistance in the mat allows static to be drained through banana plug or clip to ground but the resistance is high
enough so it should not have any effect when a board under power rests on it. Most wrist straps will have a 1 meg resistor between the
strap and ground.
I went cheap to stay within budget and purchased a Startech anti-static mat from Staples.com for about half
of what a mat costs from an electronics distributor. Electrically it's about the same and will have no problem draining static.
Due to the low price, I'm not sure how the surface will hold up to scratches, heat, and solder drops yet.
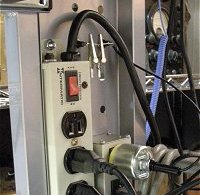
To connect the mat and wrist strap I mounted two banana jacks in the side of one of the Mayline's legs.
The legs on each side of the desk have pre-drilled holes that allowed me to mount the jacks without any drilling.
To connect the banana jacks to ground I took a standard line cord plug and mounted a single banana jack in it connected to the ground pin.
The plug just plugs into the power strip mounted on the inside of the leg to provide a good ground point. A banana plug wired to
the ground jacks plugs into it. I also use the same type of plug with a banana jack on my main bench when a earth/ground connection is needed.
Two power strips were also mounted on the inside of one of the legs using the holes already in the legs.
One power strip has a switch to turn the power on and off on the entire station. The two power strips give me enough
outlets for the computer and monitor, microscope light, magnifier lamp, desoldering gun, and my soldering and rework
stations with a couple outlets left over.
|
Using A Circuit Board Holder
|
An advantage to using a computer desk is the slide out keyboard tray doubles as a lower shelf for a circuit board holder.
The lower surface of the keyboard tray below the desk top helps make up for the additional height of a circuit board holder
so only minor focus adjustments may be required for microscope use. The Amscope microscope's boom is long enough to
extend the microscope head out over the keyboard tray.
The keyboard tray on this workstation is deep enough to push the keyboard and mouse back out of the way. The surface of this Mayline keyboard
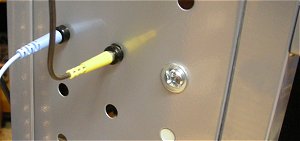
tray is smooth enough so that a Panavise board holder with a suction base sticks fine.
If you are using just a flat work surface for the microscope, using a circuit board holder with any height will make the work too tall for the
microscope to focus on. The microscope head will mount with it's mounting post pointing down or up. By flipping the microscope head mounting
post up you will have plenty of focus range when using a board holder. (photo example)
|
Now that my home ESD/solder station construction is complete and I've used it, I am very happy with the choices I've made as far as the Amscope microscope and using the Mayline computer desk as a work stand.
I'm sure I will be making modifications and additions over time but for now a few projects are waiting to be completed.
|
November 2013:
Larger Photo
2014
Related Links:
|
|
